Galletas digestive

Na súa orixe, estas galletas escocesas, deron en chamarse digestive, dixestivas, porque había a crenza de que eran boas para facer a dixestión, tendo algo así como un poder anti acidez. Aínda que en realidade non fora así, o nome segue a empregarse e hai quen pensa que estas galletas son máis saudábeis que calquera das outras. O que si é certo é que non levan ovo, a fariña é integral e non levan tanto azucre. O sabor ten un punto entre doce e salgado, unha textura moi crocante e un paso a paso moi sinxelo, agás o momento de amasalas co rolo, que é un chisco complexo. Imos aló!
Ingredientes para unhas 20 galletas:
– 100 gramos de flocos de avea
– 100 gramos de fariña integral
– 1 culleradiña de fermento químico
– 50 gramos de azucre moreno
– 1 belisco de sal
– 100 gramos de manteiga, a temperatura ambiente
– 2 culleradas de leite
Preparación paso a paso:
1. Picamos os flocos na picadora ata obter unha fariña miúda e mesturámola xunto co resto dos ingredientes secos.

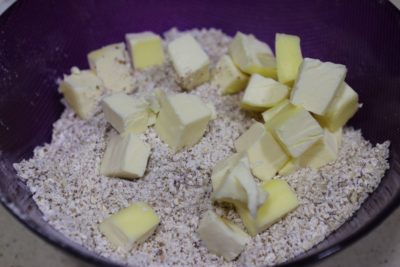
2. Engadimos a manteiga en cubos e mesturamos ben coas mans, ata que a masa teña unha consistencia areosa.
3. Engadimos o leite, seguimos amasando e formamos un bolo, que deixamos arrefriar na neveira durante uns 15 minutos.


4. Poñemos o bolo entre dous papeis de enfornar e estiramos co rolo de amasar ata que teña uns 3-4 mm de ancho. É unha masa que non une, polo que temos que ir re-amasando de cada vez.


Como vedes nas imaxes, segundo vaiades formando as galletas, a masa irá rompendo. Temos que ir arrexuntando a masa de novo, amasando co rolo e formando as galletas. Así, ata rematar toda a masa.
5. Para formar as galletas, cun cortador de galletas ou, como foi o caso, cun vaso. Enfornamos a 180 graos durante 15 minutos. Podemos poñelas ben xuntas porque non medran no forno.

6. Para arrefriar, poñémolas sobre a grella do forno para que queden ben crocantes. E listo!

Para que se conserven crocantes e no seu punto durante máis tempo, convén gardalas nun recipiente con pecho hermético ou ben nunha lata de galletas de toda a vida. Aínda que o estirado da masa sexa algo pesado, en canto lle collades o truco, xa veredes que non o é tanto como semella; sobre todo, non desesperedes, que cando se ve a masa como comeza a crebar, pensamos que iso non ten xeito, mais si, pouco a pouco irán saíndo. As primeiras custarán algo máis, mais o resto serán coser e cantar. Son unhas galletas cun punto de sal, non moi doces, moi crocantes e cun toque a manteiga, que fai que, en definitiva, estean moi boas!
____________________________________________________
Digestive biscuits
In its origin, these Scottish biscuits started to be called digestives because they were supposed to have some sort of anti-acid effect due to the use of baking soda. Although it wasn’t exactly the case, the name is still on and it is true that they are somehow healthier than the usual biscuits. They have no egg, just a small amount of sugar and the flour is wholewheat, oatmeal or both. The flavour is semi-sweet and the texture is super crunchy. The step by step is not really complicated, but the dough is not as firm as other biscuits’ and this is the hardest part for sure. Let’s go!
Ingredients for around 20 biscuits:
– 100 gr rolled oats
– 100 gr wholewheat flour
– 1 tsp baking powder
– 50 gr brown sugar
– 1 pinch of salt
– 100 gr butter, room temperature
– 2 tbsp milk
Step by step preparation:
1. Process rolled oats in a food processor until you get a nice oatmeal and mix it with the rest of the dry ingredients.
2. Add in butter, in cubes, and knead.
3. Add in milk and knead until you can shape a dough ball. Refrigerate for 15 minutes.
4. Place ball between two sheets parchment paper and roll out to about 3-4 mm. This kind of dough breaks easily, so we will need to re-roll from time to time.
As you can see in the pictures, while you shape the cookies, the dough will break, so go carefully and with patience until you have used all the dough.
5. To shape your biscuits, use a cookie cutter or a glass, as I did. Bake at 180ºC for 15 minutes. You can place them together in the baking tray because they don’t grown too much in the oven.
6. Cool over a wire rack. And that’s it!
If you want to keep them crunchy for longer, keep them inside an air-tight container or a tin. Although the rolling part seems to be a little bit complicated, don’t panic! It looks like it is going to be very difficult to work with, but in the end, everything makes sense and you will go as fast as with any other biscuit. And I can assure you these biscuits are totally worth every minute you spend rolling 🙂 I love the salty flavour and its crunchiness. And I know you’re going to like that too! Enjoy!