Torta Red Velvet

Se hai unha torta que queda ben bonitiña e que campa un mogollón, esa é a Red Velvet. Esa cor vermella intensa e esa cremiña de queixo que está taaan boa fan que sexa unha das tortas preferidas de moita xente. Despois de poñervos a receita dos cupcakes de Red Velvet, imos agora con esta versión máis grande, unha torta de 3 pisos con recheo de crema de queixo e con crema de queixo por todas partes. Saborosísima!!! Non vos poño foto do corte porque esta torta será papada por outras lambonciñas e lambonciños, así que non lle poderei sacar a foto, mais xa vos imaxinades a pintaza que ten. Incrible! E o paso a paso, do máis sinxelo. Imos aló!
Ingredientes:
– 120 gramos de manteiga
– 200 gramos de azucre
– 2 ovos
– 1 cullerada de vainilla
– 250 gramos de fariña
– unha culleradiña de fermento químico
– un chisco de sal
– 15 gramos de cacao
– 250 ml de leite amargo (250 ml de leite con 2 culleradas de zume de limón)
– colorante alimentario vermello
– crema de manteiga de queixo (ingredientes e paso a paso aquí)
Preparación paso a paso:
1. Mesturamos os ingredientes húmidos co azucre: ovos, manteiga, vainilla e azucre.

2. E por outra banda, os secos: fariña, fermento, sal e cacao.

3. Facemos o leite amargo co leite e o limón. E engadimos colorante alimentario ata que teña a cor desexada.
4. Mesturamos tódolos ingredientes e batemos ben.

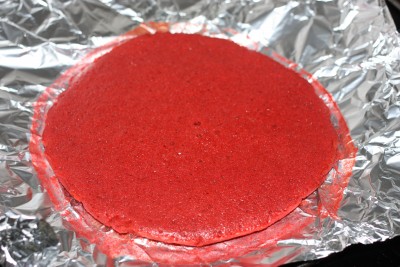
5. Como a fixen de 3 pisos, fixen tres mini biscoitos nun molde de 20 cm. Dividin a masa en tres porcións iguais e enforneinas nun molde de 20 cm en 3 fornadas duns 15 minutiños a 180ºC. Se o facedes todo a un tempo, só teremos que comprobalo cun escarvadentes e que este saia limpo.
6. E, por último, preparamos a crema de queixo e botámola entre as capas, por riba e polos lados. E listo!
Que boa está e que pintaza ten a torta Red Velvet! A cantidade de colorante dependerá do vermella que queirades a torta, como a min me gusta vela moi encarnada, boteille moito, mais iso xa depende de vós 🙂 Iso si, sede xenerosos coa crema de queixo porque está de vicio e sempre compre deixar un chisco para relamber 😀
Bo proveito!
_________________________________________________________
Red Velvet cake
If there’s a beautiful cake on Earth, that’s Red Velvet cake. No matter who you ask, this cake is always on top of our I-will-always-love-you list! That intense red colour and the oh-my-god-this-is-delicious cream cheese make this cake one of the best cakes ever! After trying the Red Velvet cupcakes, I knew I had to make the bigger version any time or other, and this time has finally arrived! And yes, it’s been so worthy. As the cake is not meant to be eaten by me, I cannot show you the best picture, that in which we see the white and red colours of the beautiful cut this cake has. But I’m sure your imagination will picture it perfectly. Let’s go!
Ingredients:
– 120 gr butter
– 200 gr sugar
– 2 eggs
– 1 tbsp vanilla
– 250 gr flour
– unha tsp baking powder
– a pinch of salt
– 15 gr cocoa
– 250 ml buttermilk
– red food colouring
– cream cheese frosting (ingredients and step by step here)
Step by step preparation:
1. Beat eggs, butter, vanilla and sugar.
2. And, on the other hand, mix flour, baking powder, salt and cocoa.
3. Mix buttermilk and food colouring until you get the desired red colour.
4. Mix all ingredients until well integrated.
5. As I did this red velvet cake with 3 thin cakes, I bake them in 3 times in a 20 cm mould at 180ºC/360ºF for around 15 minutes. If you bake it all together, remember the toothpick inserted in the middle should come out clean.
6. And last, prepare the cream cheese frosting and use it between the thinner cakes and on top and sides. And that’s it!
I used these little sugar hearts to decorate, but you can use whatever you want, it will be as delicious! I absolutely love the way it looks! So red with a so velvet-y texture and so yummy!!! If you are a cream cheese frosting fan, prepare a lot! I always love licking every single utensil I used after preparing cream cheese frosting. And it tastes so good in this cake!
Enjoy!!!